How to Create a YouTube Channel Trailer: 12 Easy Tips
How to Create a YouTube Channel Trailer: 12 Easy Tips

How to Create a YouTube Channel Trailer: 12 Easy Tips
A YouTube channel trailer is a short introduction that helps new visitors understand what your channel is about. It gives people a quick look at your content, explains what they can expect, and encourages interested viewers to explore your videos or subscribe.
If you are building a new channel, creating a trailer can make your homepage more welcoming and informative. You do not need expensive equipment or professional editing software. With a clear message, a simple script, and a few useful clips, you can create an effective introduction.
In this guide, you will learn how to create a YouTube channel trailer, plan its content, edit it, and add it to your channel homepage.
What Is a YouTube Channel Trailer?
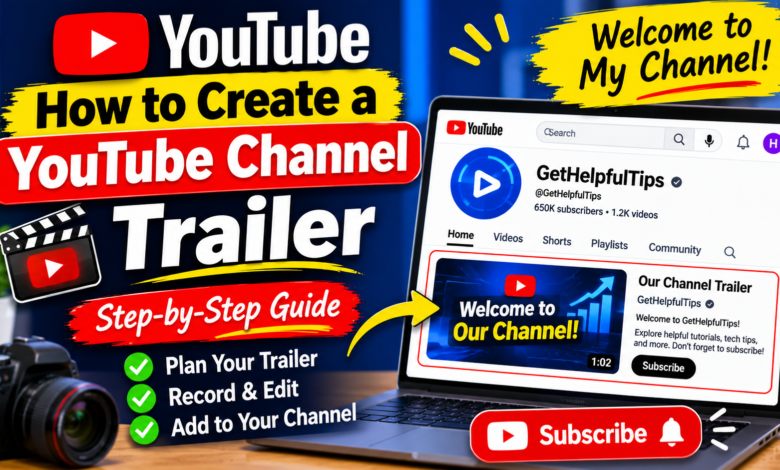
A YouTube channel trailer is an introductory video displayed on your channel homepage for people who have not subscribed. It helps introduce your channel, its main topics, and the value viewers can get from watching your content.
For example, a technology channel could use a trailer to explain that it publishes tutorials about AI tools, software, YouTube growth, and internet tips.
You can also select a separate featured video for returning subscribers. This allows you to show different content to new visitors and people who already follow your channel.
1. Decide the Purpose of Your Trailer
Before recording anything, decide what you want your trailer to achieve.
Your main goal should be to help visitors understand your channel quickly. Think about the questions a new visitor might have:
- What is this channel about?
- What type of videos does it publish?
- Who will find the content useful?
- Why should someone subscribe?
Write down the main message you want to communicate. Avoid trying to explain everything about your channel in one short video.
A focused introduction is easier to understand and gives viewers a clear reason to explore your content.
2. Choose a Suitable Video Length
Your trailer should be long enough to explain your channel but short enough to maintain interest.
For many beginner channels, a video of approximately 30 to 60 seconds is a practical starting point. However, the ideal length depends on your content and how much information you need to share.
Avoid adding unnecessary introductions or long personal stories. Focus on the most important details and move quickly from one point to another.
Remember that a useful message matters more than reaching a specific video length.
3. Write a Simple Trailer Script
A script helps you organize your message and avoid forgetting important details.
You can structure your trailer into four simple parts:
- Introduction: Tell viewers what your channel is about.
- Content: Explain the topics you cover.
- Benefits: Describe what viewers can learn or discover.
- Call to action: Invite interested visitors to explore your videos and subscribe.
For example:
“Welcome to my channel! Here, you will find helpful tutorials about YouTube growth, AI tools, technology, and online tips. My goal is to make digital topics easier to understand with simple step-by-step guides. Explore the videos and subscribe for more useful tutorials!”
Use natural language that matches your personality. Your script should sound like a real introduction, not a formal advertisement.
4. Show What Your Channel Offers
A good trailer should give visitors a preview of your actual content.
You can include short clips from your existing videos, screenshots, demonstrations, or examples of topics you regularly cover.
For example, a cooking channel might show quick clips of recipes, while a technology channel could include software demonstrations and useful tool tutorials.
Choose visuals that accurately represent your channel. Avoid showing content that you do not plan to publish regularly.
5. Record Your Trailer With a Phone or Camera
You do not need a professional camera to create a channel trailer.
A modern smartphone can record suitable video when you use good lighting and keep the camera steady.
Follow these simple recording tips:
- Clean your camera lens before recording.
- Choose a quiet location.
- Use natural light or a suitable lamp.
- Keep your phone or camera stable.
- Speak clearly and at a comfortable speed.
- Record multiple takes if necessary.
If you run a faceless channel, you can use screen recordings, animations, text, illustrations, or voiceovers instead of appearing on camera.
6. Use Clear Audio and Background Music
Audio quality is an important part of a good introduction. Viewers may stop watching if your voice is difficult to understand.
Record in a quiet room and keep your microphone close enough to capture clear speech. If necessary, use a basic microphone or your phone’s headset microphone.
You can also add background music to make the trailer more engaging. Choose music that does not overpower your voice and that you have permission to use.
YouTube Audio Library is one option for finding music and sound effects. Always check the usage conditions for the specific track you choose.
7. Edit Your Trailer Professionally
Editing helps turn your recorded clips into a clear and organized introduction.
You can use beginner-friendly editing tools such as CapCut, Clipchamp, or other video editors that suit your device.
During editing:
- Remove unnecessary pauses.
- Arrange clips in a logical order.
- Add readable text where useful.
- Keep transitions simple.
- Balance voice and background music.
- Add your channel name or logo if appropriate.
Avoid using too many effects, animations, or distracting transitions. The purpose of your trailer is to introduce your channel, not to demonstrate every editing feature.
8. Add Your Channel Name and Branding
Your trailer should help visitors recognize your channel.
Include your channel name in a visible place and consider using consistent colors, fonts, and visual elements that match your channel branding.
For example, a technology channel might use a clean design with simple icons and modern graphics.
Make sure the branding does not cover important visuals or make the screen difficult to read. Consistency between your trailer, profile picture, banner, and videos can help create a recognizable channel identity.
9. Include a Clear Call to Action
At the end of your trailer, tell viewers what they can do next.
A simple call to action could be:
“If you enjoy practical technology tutorials and useful online tips, explore the videos on this channel and subscribe for more.”
Keep the invitation friendly and relevant. Do not make unrealistic promises or repeatedly ask viewers to subscribe throughout the video.
You can also mention a useful playlist or encourage visitors to watch a related video.
10. Export Your Video With Suitable Settings
After editing, export your trailer in a video format supported by YouTube.
MP4 with H.264 video encoding is a common choice. Export at a resolution that matches your original footage, such as 1080p, when possible.
Before uploading, watch the exported file from beginning to end. Check for:
- Audio problems
- Blurry visuals
- Incorrect text
- Unexpected black screens
- Missing clips
- Poorly balanced music
A final review can help you catch mistakes before the trailer appears on your channel.
11. Upload Your Trailer to YouTube
Once your video is ready, upload it to your YouTube channel.
Follow these steps:
- Open YouTube and sign in.
- Click the Create (+) button.
- Select Upload video.
- Choose your trailer file.
- Add a clear title and description.
- Complete the required video details.
- Review the visibility settings.
- Publish the video when it is ready.
You can use a title such as “Welcome to My Channel” or a title that describes your channel’s main topic.
Make sure the video is published and available to the audience you want to reach before selecting it as your trailer.
12. Add Your Trailer to Your Channel Homepage
After uploading your video, select it as your channel trailer.
Follow these steps:
- Open YouTube Studio.
- Select Customization from the left menu.
- Open the Home tab.
- Find the video spotlight or featured content area.
- Choose the option for a channel trailer for people who have not subscribed.
- Select your uploaded trailer.
- Click Publish to save your changes.
You may also be able to choose a separate featured video for returning subscribers.
YouTube can update its interface, so the exact labels may vary. After publishing your settings, visit your channel homepage to confirm that the correct video is displayed.
Common Mistakes to Avoid
When creating a YouTube channel trailer, avoid these common mistakes:
- Making the trailer too long: Focus on the most important information.
- Using unclear audio: Make sure your voice is easy to understand.
- Adding too much information: Introduce your main topics instead of explaining every video.
- Using unrelated clips: Show content that represents your channel.
- Forgetting the call to action: Give interested visitors a clear next step.
- Ignoring mobile viewers: Make sure text and important visuals are easy to see on smaller screens.
- Leaving the trailer outdated: Update it when your channel’s focus or content changes significantly.
Conclusion
Learning how to create a YouTube channel trailer can help you introduce your content to new visitors and make your channel homepage more informative. Start by planning a simple script, recording clear footage, editing your clips, and adding a friendly call to action.
Once your trailer is uploaded, use YouTube Studio’s customization settings to display it for people who have not subscribed. Review the final result on both desktop and mobile devices.
Remember, a successful trailer does not need expensive equipment or complicated effects. It needs a clear message, useful content previews, and a genuine introduction to what your channel offers.