
How to Edit YouTube Subtitles Automatically: 12 Easy Tips
How to Edit YouTube Subtitles Automatically: 12 Easy Tips

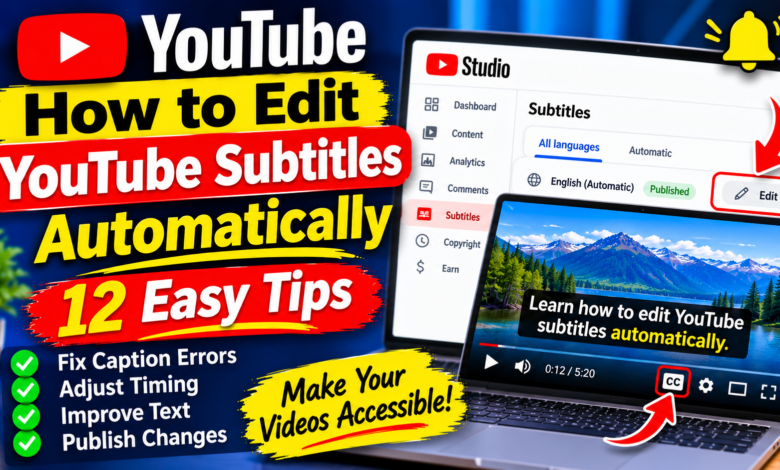
How to Edit YouTube Subtitles Automatically: 12 Easy Tips
YouTube automatically generates subtitles for many videos using speech recognition technology. These captions help viewers understand spoken content, but they are not always completely accurate. Background noise, accents, fast speech, and technical words can cause mistakes.
If you publish tutorials, educational videos, or technology content, incorrect subtitles can confuse your audience. Fortunately, YouTube Studio allows creators to review and edit automatically generated captions without uploading the video again.
In this guide, you will learn how to edit YouTube subtitles automatically, correct caption mistakes, adjust timing, and publish accurate subtitles using YouTube Studio.
What Are Automatically Generated YouTube Subtitles?
Automatically generated subtitles are captions created by YouTube’s speech recognition system. The platform analyzes the audio in a video and converts spoken words into text.
These captions can save creators time because they do not have to type every sentence manually.
However, automatic subtitles may contain:
- Incorrectly recognized words.
- Missing punctuation.
- Misspelled names.
- Errors in technical terms.
- Incorrect sentence timing.
- Confusing text caused by background noise.
You should always review automatically generated captions before relying on them.
1. Open YouTube Studio
The first step is to access YouTube Studio using the account connected to your channel.
Follow these steps:
- Open YouTube in your web browser.
- Sign in to your creator account.
- Click your profile picture.
- Select YouTube Studio.
- Wait for the dashboard to load.
Make sure you are using the correct channel if you manage multiple accounts. YouTube Studio provides the tools needed to manage your videos, subtitles, and other channel settings.
2. Select the Video You Want to Edit
After opening YouTube Studio, find the video whose automatic subtitles need correction.
- Click Content in the left-side menu.
- Find the video in your uploaded content.
- Click its title or thumbnail.
- Open the video’s details.
- Select Subtitles from the available options.
You can edit subtitles for an existing video without uploading the video again.
If automatic captions have not finished processing, you may need to wait until YouTube makes them available.
3. Find the Automatically Generated Captions
Inside the Subtitles section, look for the available language tracks.
You may see a subtitle track marked as automatically generated or automatic captions. Select the appropriate language to review its content.
If the captions are available, open the editing option.
Keep in mind that automatic captions are not available for every video or language. Processing time and availability can depend on audio quality, language support, and other factors.
4. Open the Subtitle Editor
Once you select the automatic caption track, look for the option to edit or duplicate the subtitles, depending on the controls available in your YouTube Studio account.
The subtitle editor allows you to review the recognized words and make corrections.
You may see:
- Text segments.
- Video playback controls.
- Subtitle timing information.
- Editing fields.
- Save or publish options.
Play the video while reviewing the text. This helps you compare the captions with the original spoken words.
5. Correct Misspelled Words
One of the most common problems with automatic captions is incorrect word recognition.
For example, YouTube might misunderstand a software name, product name, or technical term.
Read each subtitle carefully and correct words that do not match the audio.
Pay special attention to:
- People’s names.
- Brand names.
- Software names.
- Numbers and dates.
- Technical vocabulary.
- Important instructions.
Do not guess when a word is unclear. Replay the relevant section and listen carefully before making changes.
6. Fix Grammar and Punctuation
Automatic captions may recognize spoken words correctly but still produce text that is difficult to read.
You can improve readability by correcting punctuation and sentence structure without changing the speaker’s intended meaning.
For example, add commas where natural pauses occur and full stops at the end of complete sentences.
Use capitalization consistently, especially for names and official product titles.
Avoid rewriting the entire spoken message unnecessarily. The goal is to make the subtitles accurate and readable.
7. Adjust Subtitle Timing
Correct text is only one part of a good subtitle track. The captions must also appear at the right time.
If a subtitle appears too early or too late, viewers may struggle to follow the video.
To improve timing:
- Play the video from the beginning of the affected section.
- Compare the spoken words with the displayed captions.
- Adjust the start time if the text appears too early or late.
- Adjust the end time if the caption disappears too quickly.
- Replay the section to check the result.
Keep subtitle segments synchronized with the speech. Avoid displaying long blocks of text when shorter segments would be easier to read.
8. Review the Entire Video
Do not check only the first few minutes of your video.
Play the complete video with subtitles enabled and look for mistakes throughout the content.
Automatic recognition can become less accurate when:
- Several people speak at once.
- Music covers the speaker’s voice.
- The speaker talks very quickly.
- The recording contains background noise.
- Unusual words are used.
Reviewing the complete video helps you identify problems that might otherwise remain unnoticed.
9. Use a Clear Audio Recording for Better Captions
The quality of your original audio can affect automatic subtitle accuracy.
YouTube may struggle to recognize speech when the recording contains excessive noise, echo, or very low volume.
For future videos, try these recording improvements:
- Record in a quiet room.
- Keep your microphone close enough.
- Avoid loud background music.
- Speak clearly and naturally.
- Reduce unnecessary background noise.
- Check your recording before uploading.
Better audio can make automatic captions easier to review and correct.
10. Add Punctuation and Break Long Sentences
Long subtitle lines can be difficult to read, particularly on mobile devices.
Break lengthy sentences into smaller, meaningful sections where appropriate.
For example, instead of displaying one long paragraph, divide it into shorter caption segments that follow the speaker’s natural pauses.
Use punctuation to make the meaning clear. However, do not split sentences in a way that changes their meaning or makes the text confusing.
Your subtitles should be easy to follow while viewers watch the video.
11. Save and Publish Your Edited Subtitles
After correcting the text and timing, review your changes one final time.
Check spelling, punctuation, synchronization, and language selection.
When everything is correct, use the available Save or Publish option in YouTube Studio.
The exact button and workflow may differ depending on the subtitle editor and whether you are editing an existing track or creating a corrected version.
After publishing, open the video on YouTube and turn on captions using the CC button to confirm that your updated subtitles appear correctly.
12. Translate Subtitles Into Other Languages
After correcting your original subtitles, you may want to make your content accessible to viewers who speak other languages.
YouTube Studio allows creators to add additional language tracks when the relevant features are available.
For example, you could provide Urdu, Spanish, or German subtitles for an English-language tutorial.
You can enter translated text manually or use an appropriate translation workflow. Always review translations carefully because automatic translations may misunderstand technical terms or change the original meaning.
Start with languages that are relevant to your audience rather than adding translations you cannot properly review.
Common Mistakes to Avoid
When learning how to edit YouTube subtitles automatically, avoid these common mistakes:
- Trusting every automatic caption: Review the complete subtitle track.
- Ignoring technical words: Correct software names, brands, and important terms.
- Skipping timing checks: Make sure captions match the spoken audio.
- Using long text segments: Break captions into readable sections.
- Forgetting punctuation: Make subtitles easier to understand.
- Publishing without testing: Watch the video with captions enabled after saving.
- Ignoring translations: Review additional language tracks for accuracy.
Conclusion
Learning how to edit YouTube subtitles automatically can save time while making your videos more accessible and easier to understand. YouTube Studio allows you to review automatic captions, correct spelling mistakes, improve punctuation, adjust timing, and publish updated subtitle tracks.
Start by opening YouTube Studio, selecting your video, and visiting the Subtitles section. Review the automatically generated text carefully and correct any mistakes before publishing.
Remember, automatic captions are a useful starting point, not a guarantee of perfect subtitles. A careful review can make a big difference in the quality of your viewers’ experience.